
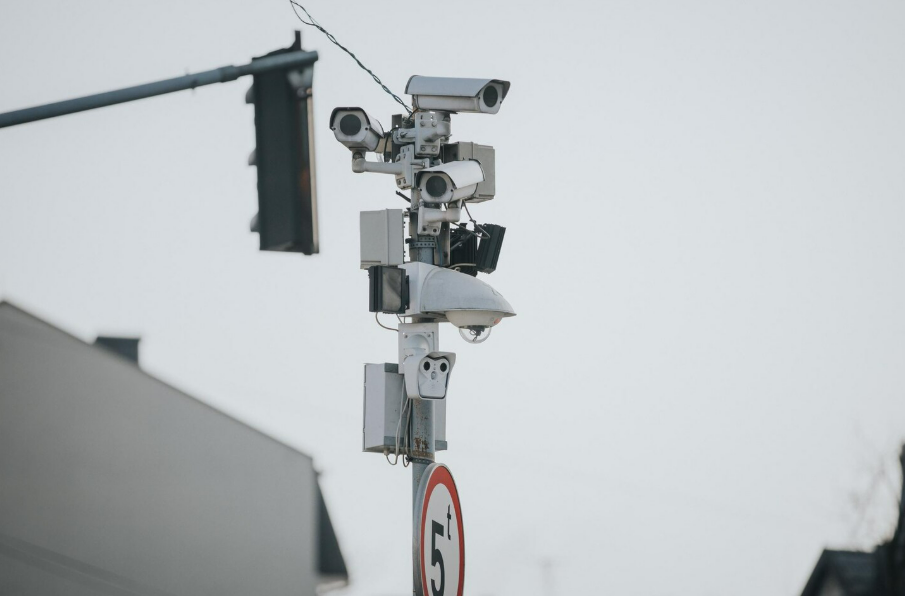
There is one mistake that turns up on more sites than any other, and it costs people the whole project. The camera goes up in month one, everyone is happy with the view, and then in month nine the tower has grown past the frame. Half the building is now out of shot. Nothing you do in editing fixes that.
Placement is the part nobody wants to spend time on and the part that decides whether your footage is worth anything eighteen months later. An expensive construction camera in a bad position loses to a modest one in the right spot, every single time.
So here is what actually matters when you are deciding where things go.
Frame the Finished Building, Not the Empty Plot
This is the big one. When you stand on an empty plot in Business Bay, the instinct is to frame what you can see. Excavators, hoarding, a lot of sand.
Wrong instinct. Pull up the elevation drawings and work out where the roof line will sit when the thing is topped out. Frame for that, then accept the first two months will look a bit empty at the bottom of the shot. Empty foreground for eight weeks beats a decapitated tower for the following year.
Same thinking applies horizontally. Cranes swing, site offices move, deliveries stack up in places nobody planned for. Leave yourself margin on all four sides.
Watch the Sun Before You Pick the Wall
In Dubai this matters more than most places. The light is brutal and it moves through a wide arc across the year.
General rule: put the camera so it is shooting roughly northward, with the sun behind or beside it. Point a construction camera west and every afternoon you get a washed-out, flared mess for two hours. Point it east and you lose your mornings. Neither is recoverable.
Then there is glass. Half of what gets built here ends up clad in reflective curtain wall, and a neighbouring tower bouncing afternoon sun straight into your lens will ruin frames you did not think were at risk. Check what is already standing around the plot, not just what you are building.
Height and Distance
Rough guidance that holds up most of the time:
Distance. Somewhere between one and two times the final building height, measured from the base. Too close and you are craning upward with heavy distortion. Too far and the detail disappears, especially in the haze that sits over the city on humid days.
Height. Aim for roughly a third to halfway up the eventual structure. From there you see the floor plates stack, and you keep some sense of the ground activity. Mounting at street level makes every tall build look like a wall.
Angle. Slight downward tilt is usually wrong for towers and usually right for horizontal projects like villas, warehouses, and infrastructure. Match the geometry of what you are documenting.
Power and Signal Decide More Than People Expect
Plenty of perfect viewpoints get ruled out for boring reasons. No power. No signal. No way to get a technician up there safely once a month.
Before falling in love with a position, check three things. Is there a stable supply, or does this need solar with enough battery to survive a cloudy stretch. Is there usable 4G coverage at that exact spot, because coverage at ground level tells you nothing about coverage forty metres up between two towers. And can someone physically reach it for cleaning, because dust builds on a housing here faster than anyone new to the region expects.
A brilliant angle you cannot service is not a brilliant angle.
Mount to Something Permanent
Never fix to scaffold. Never fix to hoarding, temporary fencing, a site office roof, or anything that will be dismantled, relocated, or knocked by a reversing truck.
Best options, in order: a neighbouring permanent building with owner permission, a dedicated pole set in concrete, or a structure on your own plot that will not move for the duration. Getting written permission from an adjacent building owner takes a couple of weeks in Dubai, so start that conversation early rather than defaulting to a compromised position because the paperwork felt slow.
Every time a construction camera gets moved mid-project, the sequence breaks. The final edit shows a visible jump, and any progress comparison you were running against earlier images stops lining up.
One Camera or Several
For a single tower, one well-placed construction camera usually does the job.
For anything sprawling, one is not enough. Large mixed-use developments, infrastructure runs, multi-plot sites, phased handovers. In those cases two or three positions covering different faces give you something genuinely usable, and it lets you keep documenting phase two while phase one is already occupied.
The other reason for a second unit is insurance against the unexpected. Another developer puts up a tower right in your sight line, which happens here more often than you would like, and a single-camera project suddenly has no view at all.
Security Cameras Follow Different Rules
Worth separating these clearly, because people try to make one unit do both and end up with neither working properly.
Progress cameras want distance and a wide view. Security wants close coverage of specific points: gates, material stores, fuel, plant compounds, the fence line where people actually climb over. A good Video Recording and CCTV Recording layout puts units low, tight, and pointed at the places where things go missing, with proper night capability rather than a hopeful IR blast into open ground.
Two different jobs. Two different placement logics. Run them together and let each do what it is good at.
Mistakes That Come Up Again and Again
Mounting on the tower crane. It moves, it vibrates, and it comes down before your project is finished.
Framing tight because the early progress looks impressive. It will not look impressive in month twelve when the roof is cropped off.
Ignoring the neighbours. A vacant lot beside you today is a construction site next quarter and a tower the year after.
Skipping the site survey and choosing from a satellite image. Elevation, obstructions, and glare do not show up in a top-down view.
Forgetting maintenance access entirely, then discovering the only route to the camera is through a section that got sealed off six months ago.
How the Survey Should Go
A proper visit takes about an hour. Walk the plot, look at where the sun sits at different times, check what is standing nearby and what is planned, talk through the phasing so the framing accounts for how the site will change.
Then it is a matter of matching hardware to position. IP units where remote access and continuous monitoring matter most. DSLR where a flagship development needs cinema-grade output. Gigapixel where the site is large enough that you need to zoom into detail without losing the wide view.
Any decent Construction Time Lapse Service does this survey before quoting, not after installing. If someone gives you a price over the phone without seeing the site, they are guessing at the placement, and placement is the whole thing.
The Short Version
Frame for the finished building. Keep the sun behind you. Mount to something permanent, reachable, and powered. Add a second position on anything large or phased. Keep security coverage separate from progress coverage.
Get those right at the start and the footage takes care of itself for the next two years. Get them wrong and no amount of good equipment saves it.
We install across Dubai and the wider UAE and we have seen most of the ways this goes sideways. If you have a site coming up and want a straight answer on where the cameras should sit, give us a call and we will come look at it with you.